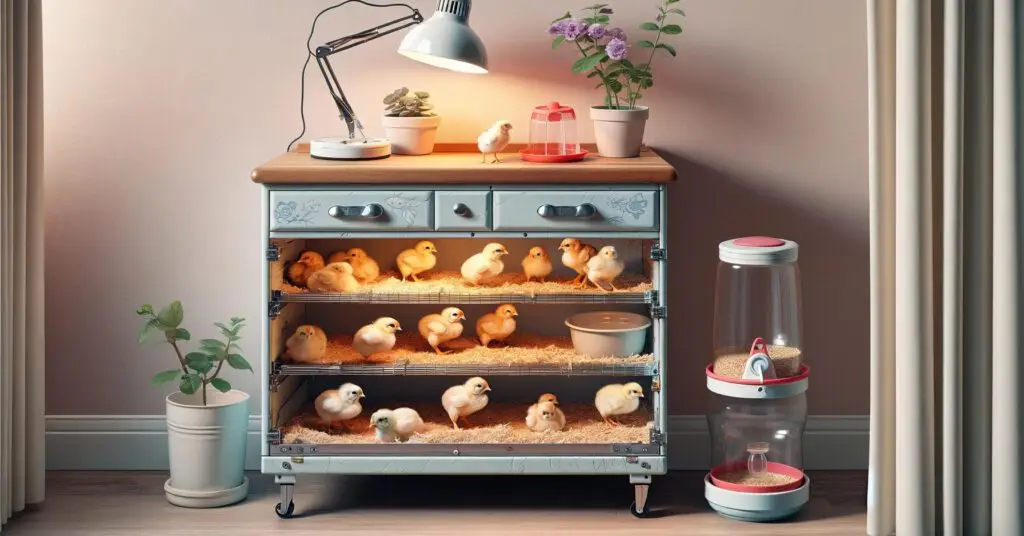
Welcome to the world of sustainable chick-rearing. If you’re looking for a creative and eco-friendly way to give your baby chicks the best start in life, you’ve come to the right place. Unlike building the chick brooder in our DIY Chick Brooder post, this upscaled chick brooder shows you how to transform a used kitchen cabinet into a cozy brooder for your baby chicks. Our upscaled chick brooder gives new life to old materials and provides a safe and comfortable environment for your chicks to thrive. Let’s dive into the step-by-step instructions and get started on this exciting DIY project.
How to Build an Upcycled Brooder from a Used Kitchen Cabinet
Looking for an eco-friendly way to raise baby chicks at home? Consider repurposing a used kitchen cabinet into a brooder! Follow these step-by-step instructions to create a cozy and sustainable space for your feathered friends:
Materials Needed:
- Used kitchen cabinet
- Box cutter or jigsaw
- Hardware cloth or mesh for ventilation
- Heat lamp or heating pad
- Feeder and waterer
Step 1: Choose a Suitable Cabinet
Select a used kitchen cabinet that is large enough to accommodate the number of chicks you plan to raise. Ensure the cabinet is sturdy and has solid walls to provide adequate insulation and protection for the chicks.
Step 2: Prepare Ventilation Holes
Use a box cutter or jigsaw to carefully cut ventilation holes along the sides of the cabinet. Ensure the holes are evenly spaced and large enough to allow for proper airflow while preventing chicks from escaping.
Step 3: Install Ventilation Mesh
Cut pieces of hardware cloth or mesh to fit over the ventilation holes. Secure the mesh in place using screws or adhesive, ensuring it covers the holes completely to prevent chicks from escaping.
Step 4: Create an Access Door
Determine where you want the access door to be located on the cabinet. Use a box cutter or jigsaw to carefully cut out a rectangular door, leaving enough space for chicks to enter and exit. You can also repurpose one of the existing cabinet doors as the access door.
Step 5: Set Up Heat Source
Place a heat lamp or heating pad inside the cabinet to provide warmth for the chicks. Position the heat source at one end of the cabinet to create a temperature gradient, allowing chicks to regulate their body temperature as needed.
Step 6: Add Feeder and Waterer
Place a feeder and waterer inside the cabinet, ensuring they are easily accessible to the chicks. Fill the feeder with chick starter feed and the waterer with clean, fresh water.
Step 7: Monitor Temperature and Humidity
Use a thermometer to monitor the temperature inside the brooder, aiming for a temperature of around 95°F (35°C) for newly hatched chicks. Keep the brooder in a draft-free area and adjust the heat source as needed to maintain a consistent temperature. Monitor humidity levels using a hygrometer and adjust as necessary to keep chicks comfortable.
Step 8: Regular Maintenance
Clean the brooder regularly by removing soiled bedding and replacing it with fresh material. Monitor chicks for signs of illness or stress, and provide appropriate care as needed. As the chicks grow, gradually increase the size of the brooder or move them to a larger enclosure.

Following these step-by-step instructions, you can easily create an upcycled brooder from a used kitchen cabinet to raise baby chicks at home.
Final Thoughts
With your upcycled kitchen cabinet brooder complete, you’re ready to embark on a rewarding journey of chick-rearing. You’ve created a sustainable and functional space for your baby chicks to grow and flourish by repurposing materials and tapping into your creativity. As you watch your chicks thrive in their new home, take pride in knowing you’ve contributed to their well-being and the planet’s health.
