
How to Compost Chicken Manure Safely (Step-by-Step for Beginners)
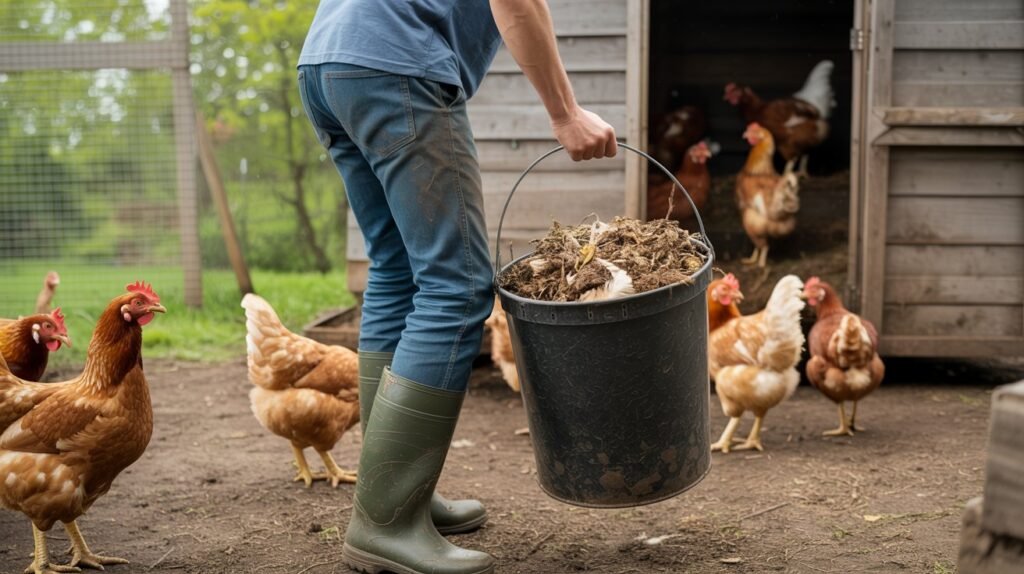
Disclosure: This post may contain affiliate links. If you purchase through these links, I may earn a small commission at no extra cost to you. Chicken manure is one of the best things your flock can produce for your garden. There’s a reason it’s called garden gold. It is rich in nutrients, especially nitrogen, and can make excellent compost when handled properly. The problem is that raw chicken manure is too strong to use straight from the coop. It can burn plants, add too much salt, and raise food safety concerns if used without proper composting and curing. That is why composting matters. Instead of treating coop cleanup like a waste problem, you can turn manure and used bedding into a dark, crumbly soil amendment that improves soil structure, water-holding capacity, and nutrient availability. University extension sources note that well-managed composting helps reduce odor and pathogen concerns compared with simply piling manure and litter in one spot. If you are still working on your coop routine, read our How to Clean a Chicken Coop guide first. Why You Should Compost Chicken Manure Instead of Using It Fresh Fresh chicken manure is powerful, but it is not garden-ready. Chicken manure has a very low carbon-to-nitrogen ratio compared with materials like straw, leaves, or wood shavings. Kentucky and Nebraska extension sources note that successful composting usually works best at a carbon-to-nitrogen (C/N) ratio of about 30:1, while chicken manure is much higher in nitrogen. That is why bedding matters so much in the compost pile. In addition to adding bedding from the coop, add grass clippings and leaves from your yardwork. If you know someone with a lawn service, you may be able to take some of the grass clippings and leaves off their hands. They may be all too happy to have you take them rather than having to dispose of them themselves. Raw manure can also be too salty and too strong for seedlings and transplants. The University of Idaho and Oregon both warn that manure-based composts can cause plant problems if they are not fully composted and cured before use. While some gardeners say you can let your compost pile cook for 2-3 months, a better timeframe is 6 months to 1 year. Once you have your first year as a backyard chicken keeper under your belt, it is easy to set up composting with your twice-yearly deep cleaning. Composting helps the material heat up, break down, and stabilize over time. Properly managed piles need the right balance of nitrogen, carbon, oxygen, moisture, and mass. All you need is a weekly stir, with the ideal time to turn being when the internal compost pile temperature falls from its peak of 130–160°F down to 130°F. When this happens, the bacteria need more oxygen to keep breaking down the compost. It’s not complicated. You need a weekly compost maintenance schedule. What You Can Compost from the Coop Most backyard flock owners can compost all of the normal coop cleanup material, including: Those materials are actually a good starting point because manure supplies nitrogen and bedding supplies carbon. The University of Idaho notes that poultry litter, with roughly 25 percent manure and 75 percent bedding, is a very good starting material for high-quality compost for garden use. What you should avoid adding: Those do not help the process and can create odor, pest, or contamination problems. What You Need Before You Start You do not need expensive equipment, but a few things make composting much easier. 🧰 Item Why You Need It Compost bin or pile area Keeps material contained and easier to manage Shovel or pitchfork For mixing and turning the pile Compost thermometer Helps you know if the pile is heating properly Carbon material like dry leaves, grass clippings, or straw Balances wet, nitrogen-rich manure Water source Adjusts moisture if the pile gets too dry Tarp or cover Keeps heavy rain from soaking the pile A compost thermometer is especially helpful because extension sources recommend monitoring heat rather than guessing. Kentucky Extension specifically recommends having one for backyard poultry litter composting. Where to Put Your Compost Pile Pick a spot that is easy to reach from the coop but not right up against your house. A good compost site should be: Kentucky Extension notes that bins do well in a shaded area, so the pile does not dry out too quickly. If your climate is very wet, a roof, tarp, or other cover helps keep the pile from turning soggy. For a small backyard flock, a simple bin system works well. One bin can hold the active pile, while a second bin or a separate area is used to cure the finished compost. A two-bin system fits in perfectly with your bi-annual deep cleaning. The Best Mix for Composting Chicken Manure This is where most beginners either succeed or struggle. Chicken manure is rich in nitrogen. Pine shavings, straw, dry leaves, grass clippings, and shredded cardboard are carbon-rich. Good composting needs both. USDA organic standards specify an initial carbon-to-nitrogen ratio of 25:1 to 40:1 for compost, and commonly recommend 25:1 to 30:1 as the sweet spot for fast composting. In plain English, that means: University of Idaho says litter with around 25 percent manure and 75 percent bedding is a very good starting point. If your coop cleanup looks much heavier on manure than that, add extra dry leaves, grass clippings, pine shavings, or straw. If it looks mostly like dry bedding with very little manure, the pile may need more nitrogen-rich material to heat up well. This is where kitchen scraps can be a helpful ingredient. However, avoid meat or greasy scraps. Step-by-Step: How to Compost Chicken Manure Now that you’ve picked the perfect spot for your compost pile and you’ve gathered all your supplies, it’s time to start cooking. Step 1: Build the pile with enough volume Tiny piles do not heat well. A pile may fail to heat because it is too small. Many home composting guides
What to Do With Chicken Poop and Coop Waste (Beginner Guide)

Disclosure: This post may contain affiliate links. If you purchase through these links, I may earn a small commission at no extra cost to you. Chicken poop is one of those things every new chicken owner thinks about eventually. At first, it does not seem like a big deal. Then the coop starts to smell, the bedding piles up, and you realize you need to manage it regularly. The good news is that chicken waste is not just something to get rid of. When handled the right way, it becomes one of the most useful by-products of raising backyard chickens. If you already have your coop set up, you’ll deal with waste every time you clean. If not, start with our Complete Beginner Guide to Raising Chickens so you understand the basics before your flock arrives. What Counts as Chicken Coop Waste Chicken coop waste is more than just manure. It includes: All of this builds up quickly inside your coop and run, making a cleaning schedule vital for your chickens’ continued good health and happiness. Regular cleaning prevents the buildup of ammonia, harmful bacteria, and parasites. That is why regular cleaning matters. When your flock’s environment is dry and clean, there is less risk of respiratory illness and other diseases like bumblefoot. It also helps control pests and keeps your eggs cleaner. If you have not yet cleaned a coop, see our guide on How to Clean a Chicken Coop, which walks you through the full process step by step. Why You Should Not Let Chicken Waste Build Up It is easy to ignore waste for a while, especially with a small flock. But it does not take long before problems show up. Most of these issues come down to one thing. Moisture. When bedding gets damp and waste builds up, your coop environment goes downhill fast. Also, accumulating chicken waste has high ammonia levels. Left unchecked, this can cause respiratory illness in your flock. In addition, it causes the buildup of harmful bacteria. For the good health of both the flock and humans, proper and regular waste management is necessary. The Easiest Ways to Handle Chicken Waste You have a few simple options for handling chicken waste. Most backyard chicken keepers use a mix of these. Compost It (Best Option) Composting is the most useful and popular way to handle chicken waste. Chicken waste is called garden gold for a reason. It is rich in nitrogen, which makes it excellent for improving soil. When you mix chicken manure with bedding like pine shavings or straw, you already have a good balance of materials and the basis for composting. Instead of throwing waste away, you turn it into something valuable. Gold. We go into more detail about this in our How to Compost Chicken Manure (Step-by-Step Guide). Use It in the Garden (After Composting) Once composted, chicken waste becomes a powerful natural fertilizer by improving soil structure, adding nutrients, and supporting plant growth. Never use fresh chicken manure directly in your garden, as it is too strong and can damage plants. Dispose of It Properly If you do not want to compost chicken waste, you can still dispose of it safely. Dispose of it with yard waste pickup, take it to a compost facility, or bag it and place it for trash pickup, depending on your local rules. Check your local guidelines before disposing of large amounts. You can also advertise free chicken waste. You would be surprised at how many gardeners would love to take it off your hands. How to Start Composting Chicken Waste (Simple Method) You do not need a complicated system to get started. Here is a simple beginner method. Step 1: Pick a Spot Choose a dry area in your yard for your compost pile or bin. Some people place their compost piles inside their chicken pen. However, this is not recommended for beginners. Step 2: Add Chicken Waste Each time you clean your coop, add the waste to your pile. This includes manure and bedding. Just scoop everything up, move it to your compost pile, and mix it in. Step 3: Add Carbon Material To balance the nitrogen in manure, mix in dry leaves, straw, and cardboard. Step 4: Keep It Slightly Moist Your compost should feel like a damp sponge. Not soaking wet and not completely dry. Step 5: Turn the Pile Occasionally Use a shovel or a pitchfork to mix the pile every 1-2 weeks. This helps to break it down faster. Step 6: Let It Break Down Over time, the material will turn into dark, crumbly compost. This is your garden gold. It can take a few months, depending on conditions like weather and the type of additions you make. 💡 Important Tip Never use fresh chicken manure directly in your garden. Always compost it first to avoid damaging plants and spreading bacteria. Common Chicken Waste Mistakes Beginners Make Most problems come from a few simple mistakes. One of the biggest is letting waste build up from too long between cleanings. This can attract pests and lead to ammonia buildup, which can cause respiratory issues. And many overlook ventilation, which plays a big role in preventing waste from becoming a bigger problem. How This Fits Into Your Coop Routine Managing chicken waste becomes easy when it is part of your routine. If you are still figuring out bedding, see our chicken coop bedding guide, which explains what works best and why. Once you combine good bedding, regular cleaning, and a simple waste plan, everything starts working together. Frequently Asked Questions What do you do with chicken poop? Most backyard chicken keepers compost it or dispose of it through yard waste systems. Can chicken waste be used as fertilizer? Yes, but only after it has been composted properly. Never place the poop directly on plants without composting first. Does chicken waste smell? It can, especially when it gets wet or builds up over time, releasing a pungent ammonia smell. How often
How to Clean a Chicken Coop (Step-by-Step for Beginners)
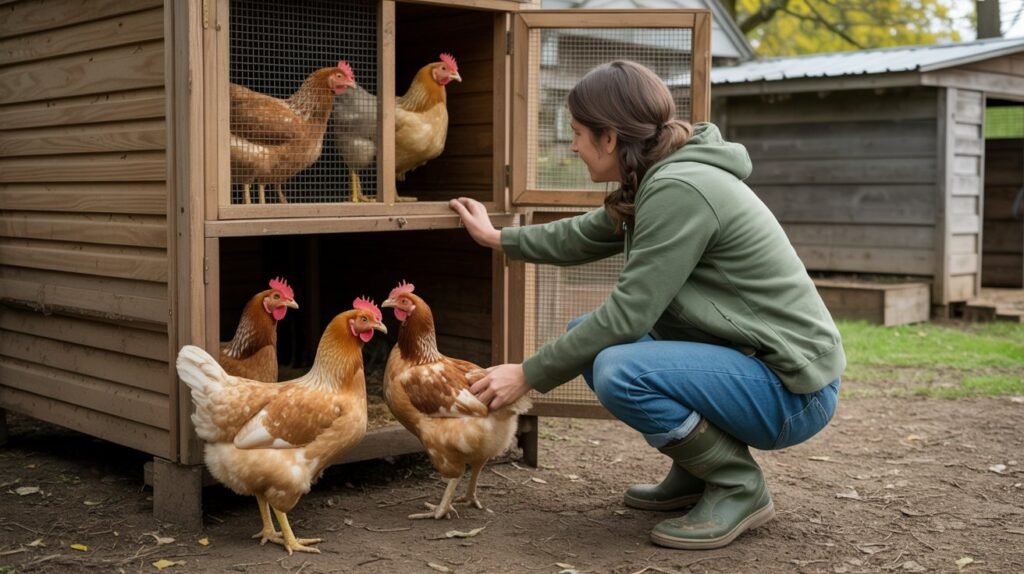
Disclosure: This post may contain affiliate links. If you purchase through these links, I may earn a small commission at no extra cost to you. If your chicken coop smells bad, looks messy, or starts attracting flies, it is time to clean it. The good news is that cleaning a chicken coop is not complicated. Once you have a simple routine, it becomes one of the easiest parts of keeping backyard chickens. Most beginners either clean too little or make it harder than it needs to be. This guide walks you through exactly what to do, step by step, so you can keep your coop clean without wasting time. If you are still setting up your coop, start with our Complete Beginner Guide to Raising Chickens, so you have the basics covered before your first deep clean. What You Need to Clean a Chicken Coop Before you start, gather a few basic supplies. Nothing fancy, just some things to make the chicken coop setup more organized. 🧰 Item 💡 Purpose Shovel or scoop Remove old bedding Bucket or wheelbarrow Carry waste out of coop Brush or scraper Loosen stuck debris Water hose or spray bottle Rinse surfaces Mild cleaning solution Disinfect coop Fresh bedding Replace old material If you are unsure what bedding to use, see our guide to chicken coop bedding for beginners, which breaks down the best options. How Often Should You Clean a Chicken Coop Most coops follow a simple schedule. Hot weather, rain, or a crowded coop may require more frequent cleaning. If your coop smells strong or feels damp, do not wait. Clean it promptly to prevent respiratory illness in your flock. Step-by-Step: How to Clean a Chicken Coop This process is simple and repeatable. Once you get a regular cleaning schedule going, you’ll be surprised at how easy it is to keep a backyard chicken flock. Step 1: Remove the Chickens Let your chickens out into the run or yard. This gives you space to work and keeps them from getting in the way. Step 2: Remove Old Bedding Use a shovel or scoop to remove all bedding from the coop floor and nesting boxes. Place it in a bucket or wheelbarrow. If you have a garden, there’s no better use for old bedding than a compost pile. Learn more about what to do with all that chicken poop in my What to Do with Chicken Poop and Coop Waste (Beginner Guide). Step 3: Scrape and Brush Surfaces After removing bedding, you will notice stuck droppings and debris. Use a scraper or brush to loosen anything stuck to the coop floor, roosting bars, and nesting boxes. This step makes a big difference in cleanliness. Step 4: Clean and Rinse Lightly spray down surfaces with water, then apply a mild cleaning solution. A simple 1:1 ratio mix of water and vinegar works well for most backyard coops. Or you can purchase a specially formulated chicken coop cleaner and deodorizer. Avoid harsh chemicals, as chickens are sensitive to strong fumes. Step 5: Let the Coop Dry Completely This step is the most important for maintaining your chickens’ health. Do not add new bedding until the coop is fully dry. Moisture is the main cause of odor and bacterial buildup. 💡 Important Tip Never put fresh bedding into a damp coop. Dry conditions are the key to controlling smell and keeping your chickens healthy. Step 6: Add Fresh Bedding Spread a fresh layer of bedding across the coop floor and inside the nesting boxes. Most coops do well with about 3 to 4 inches of bedding. Bedding should be deep enough for your hens to scratch around, rearrange, and roll around in. Once a week, scoop out soiled bedding and refill to the proper depth. Change out the bedding completely every 2 to 4 weeks, depending on how soiled it is. To make cleaning easier, consider purchasing nesting mats. These reusable mats are easy to clean and durable, helping prevent hens from scratching the bedding material out of their nesting boxes. Step 7: Return Your Chickens Once everything is dry and fresh, let your chickens back into the coop. They will usually start scratching around right away. Weekly vs Monthly Cleaning Routine 🗓️ Task 🧹 What to Do Weekly Remove droppings and add fresh bedding Monthly Remove all bedding and deep clean coop Common Mistakes When Cleaning a Chicken Coop Cleaning mistakes can create more problems than they solve. One common mistake is skipping cleaning for too long. This leads to odor, flies, and unhealthy conditions. Another mistake is using too much water. Excess moisture can soak into wood and make the coop harder to dry. Always let the coop dry completely before adding new bedding. The best plan of action is to clean the coop early in the morning and keep the chickens out in the run, or let them roam in the yard before putting them up for the night. Some beginners also use strong chemicals, which can harm chickens. Your best bet is to use a 1:1 vinegar-and-water solution to clean and disinfect your chickens’ home. How to Keep Your Coop Clean Longer There are a few simple habits that make cleaning much easier. If you want to improve your setup, check out our chicken coop bedding guide, which explains how bedding affects cleanliness. Frequently Asked Questions How long does it take to clean a chicken coop? A full cleaning usually takes 30 minutes to an hour, depending on coop size. Can I use bleach to clean a chicken coop? It is not recommended for routine cleaning. Mild solutions like vinegar are safer. What do I do with old bedding? You can compost it or dispose of it with yard waste. Why does my coop still smell after cleaning? This is usually caused by moisture or poor ventilation. Final Thoughts Cleaning a chicken coop does not have to be difficult. Once you follow a simple routine, it becomes quick and predictable. A clean coop
Chicken Coop Maintenance Tips
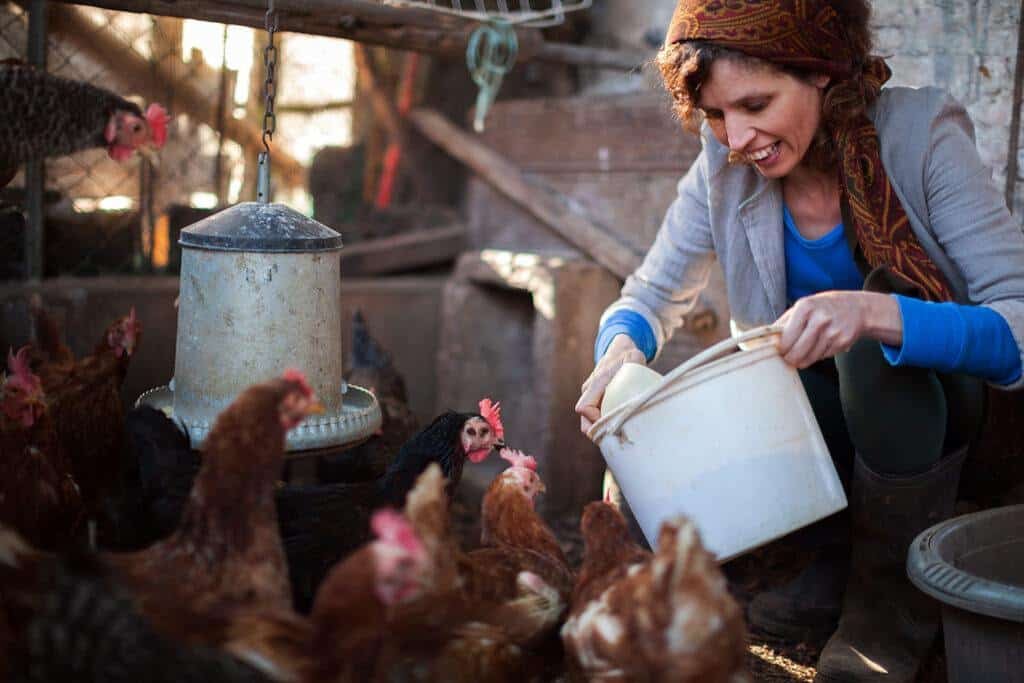
Disclosure: This post may contain affiliate links. If you purchase through these links, I may earn a small commission at no extra cost to you. As with our homes, chicken coop upkeep is year-round. Even in the middle of winter, cleaning and maintaining the coop should be topmost on our minds. Chickens don’t take a break in the winter, nor can we. Like with our homes, there is always ongoing cleaning and maintenance, no matter the time of year. Keeping a chicken coop in top shape goes beyond basic animal husbandry; it ensures your chickens are healthy and happy and lead productive lives. A clean and well-maintained coop is necessary for your chickens’ well-being. Keeping your coop clean reduces the risk of disease while enhancing the consistency of egg laying and promoting better egg quality. When you think of chicken coop maintenance, think of your home. Consider what would happen if it wasn’t regularly cleaned. Not only would the clutter be an issue, but the dirt and potential for pests would not be a happy thought. The same principles apply to a chicken coop. Chickens are naturally clean animals, and a dirty environment stresses them out. This stress can directly impact their egg-laying capacity and compromise their immune system, causing sickness and disease to spread through your flock. Make sure to read What Every Chicken Coop Needs. Besides the maintenance, there are weekly cleaning rituals you need to adopt. Weekly cleaning keeps your chickens pest-free and comfortable and transforms maintenance chores into a routine you’ll hardly think twice about. It’s More than Chicken Coop Cleanliness Chicken coop maintenance is more than cleanliness; it also involves ensuring your coop has a secure physical structure. Consider your coop as the fortress protecting your chickens against possible predator attacks and nurturing habitat for your feathery friends. Maintaining your chicken coop involves routine vulnerability checks and looking for places your chickens could escape or predators could get inside. Ensuring the strength of your chicken coop helps give your chickens their desired consistency. For your chickens to thrive, they need predictability. A well-maintained coop provides your flock with a stress-free and stable environment. This stability contributes positively to their daily routines and overall happiness. My routine includes weekly maintenance checks and necessary repairs, ensuring proper insulation and ventilation, and monitoring for any signs of damage or wear and tear. These inspections can be short and quick, or there may be times when they are lengthier because you need to search for and find security issues. These steps support your chickens’ health and maintain the coop’s longevity, saving you time and money in the long run. Weekly Cleaning Rituals In addition to daily maintenance tasks, a weekly cleaning ritual is paramount for maintaining a healthy and hygienic environment for your backyard chickens. A thorough weekly cleaning routine ensures your flock’s well-being and helps prevent the spread of diseases and pests. Start by removing all bedding material from the coop and nesting boxes and replacing it with fresh bedding to keep the coop dry and odor-free. Inspect the coop for any signs of wear and tear, such as loose wires or damaged wood, and make necessary repairs to ensure its structural integrity. Next, thoroughly clean all surfaces inside the coop using a mild detergent or poultry-safe disinfectant. Pay special attention to areas where droppings accumulate, such as perches and roosting bars. Scrubbing these areas will help eliminate bacteria and reduce the risk of infection. Don’t forget to regularly clean and refill waterers and feeders to prevent contamination and ensure your chickens have access to clean water and fresh feed. Consider using automatic waterers and feeders to streamline the process and minimize the risk of contamination. While you clean the coop, inspect your chickens for signs of illness or injury. Check their eyes, nostrils, and feathers for abnormalities, and observe their behavior for signs of distress. Early detection of health issues is crucial for prompt intervention and treatment. Chicken Coop Maintenance Checklist ? Chicken Coop Maintenance Checklist ?️ Check and refill waterers and feeders daily to ensure your chickens can access clean water and fresh feed. Collect eggs daily to prevent them from getting dirty or damaged. Monitor your chickens for signs of illness or injury, such as lethargy or abnormal behavior. Inspect the coop and surrounding area for signs of predators or potential hazards, such as loose wires or holes in the fencing. Provide enrichment activities, such as dust baths or fresh greens, to keep your chickens mentally stimulated and happy. Keep the coop and nesting boxes tidy by removing debris or waste daily. Maintain proper ventilation in the coop by opening windows or vents to prevent moisture buildup and respiratory issues. By incorporating these additional daily maintenance tasks into your routine, you can ensure the health and well-being of your backyard chickens and promote a clean and comfortable living environment for them. Brought to You by thebackyardchickenfarmer.com ? Final Thoughts Maintaining a clean and well-maintained chicken coop is essential for ensuring your flock’s health, happiness, and productivity. Implementing regular cleaning rituals and conducting routine maintenance checks can create a safe and comfortable environment for your chickens to thrive. Keeping your chicken coop clean helps reduce the risk of disease and pests and contributes to your chickens’ overall well-being. Maintaining the coop’s physical structure also helps ensure its longevity and provides your chickens with a stable, stress-free environment. So, sit down and map out a weekly cleaning routine to prioritize the maintenance of your chicken coop. Your flock will thank you by supplying you with healthy eggs and cheerful clucks, and you’ll have the satisfaction of knowing you’re providing your backyard chickens with the best possible care.