
What Do Chickens Eat? A Complete Feeding Guide for Backyard Chickens
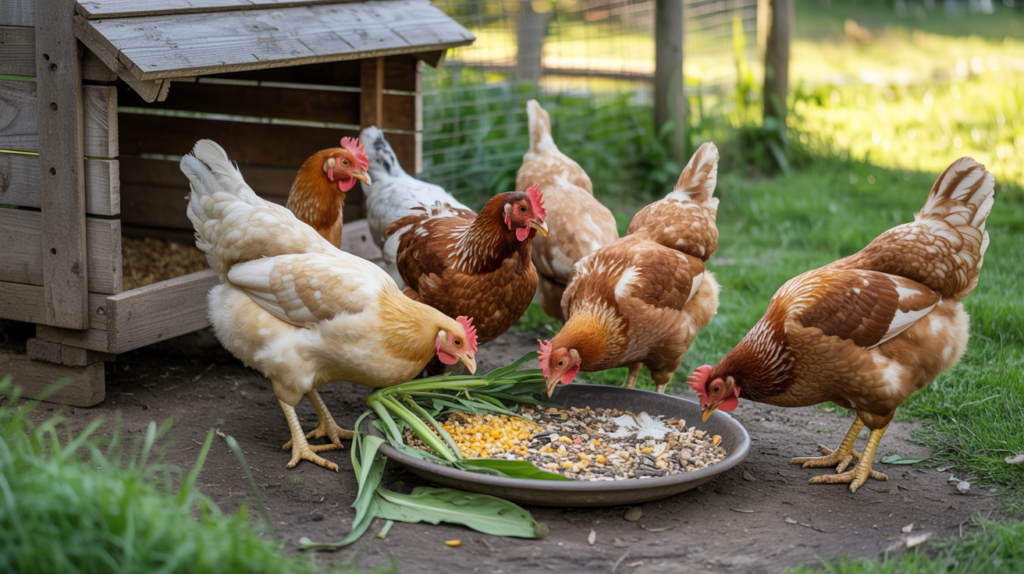
One of the first questions new chicken keepers ask is “What do chickens eat?” Closely behind it is another important question: “How do you keep a backyard flock healthy and productive?” The good news is that chickens are not very picky. They can eat a wide range of foods, including commercial feed, grains, greens, insects, and some kitchen scraps. In this complete feeding guide, you’ll learn what chickens eat, which foods are safe, which foods to avoid, how feeding changes with the seasons, and how to choose the best feed for every stage of a chicken’s life. If you’re just starting out, our Complete Beginner Guide to Raising Chickens walks through everything from choosing breeds to setting up your first coop. What Do Chickens Eat? Chickens eat a wide variety of foods both in the wild and in backyard flocks. A healthy diet typically includes commercial feed, grains, insects, kitchen scraps, and fresh greens. A good chicken diet includes commercial feed, grains, insects, kitchen scraps, and fresh greens. Each of these plays a role in keeping your flock strong and productive. Commercial feed forms the backbone of most backyard chicken diets because it’s formulated to meet a chicken’s daily nutritional needs. Beyond that, chickens are natural foragers. They scratch the ground looking for bugs, seeds, and plant matter. Feeding chickens a mix of quality feed and natural forage produces the healthiest birds. Here’s a quick overview of the foods that make up a typical backyard chicken diet: 🐔 Food Type 🌾 Role in the Diet Commercial pellets or crumble Forms the bulk of a chicken’s daily diet and provides balanced nutrition. Grains (corn, oats, barley) Provide energy and carbohydrates for active birds. Insects and worms Deliver natural protein and encourage natural foraging behavior. Kitchen scraps Offer variety and nutrients when given in moderation. Leafy greens Provide vitamins and minerals while keeping chickens active. While chickens can eat many different foods, they still need the right balance of nutrients to stay healthy. The Basics of a Healthy Chicken Diet While chickens eat a wide variety of foods, they still need a balanced diet to stay healthy. A complete chicken diet covers four main nutritional areas. Protein Protein supports feather growth, muscle development, and egg production. Laying hens need about 16% protein in their diet. Good protein sources include mealworms, fish meal, and high-quality commercial feed. Free-ranging chickens also get extra protein from insects. Carbohydrates Carbohydrates give chickens energy. Corn, wheat, and oats are common sources. Don’t overdo it with corn, though. Too much corn can throw off the nutritional balance and lead to weight gain. Vitamins and Minerals Fresh greens, vegetables, and quality feed all contribute vitamins and minerals. Chickens that forage freely tend to get a good mix naturally. Confined birds may benefit from occasional vitamin supplements, especially if they have limited access to fresh forage. Calcium Laying hens require extra calcium to produce strong eggshells. Most layer feeds include calcium, but many keepers offer oyster shell as a free-choice supplement on the side. We’ll cover this more in a later section. Types of Chicken Feed Not all chicken feed is formulated the same way. The best chicken feed depends on your bird’s age and purpose. Starter Feed Starter feed is designed for chicks from hatch through about 8 weeks of age. It’s high in protein, usually around 20–22%, and supports rapid early growth. It typically comes as a fine crumble that young chicks can eat easily. Grower Feed Grower feed is used for pullets from about 8 weeks until they begin laying, usually around 18–20 weeks. Protein drops slightly, to around 16–18%, as growth slows and the body matures. Layer Feed Layer feed is formulated to support egg production and should make up the majority of the laying hen diet. Some breeds produce more eggs than others, which can affect how much feed they consume. Our guide to the Best Chicken Breeds for Beginners explains which breeds are known for reliable egg production. The best chicken feed for layers contains around 16% protein and added calcium. Switch your hens to layer feed when they start laying their first eggs. Feeding layer feed too early can stress young kidneys, so timing matters. What Chickens Can Eat (Safe Foods) Chickens can eat a surprisingly wide range of foods. Knowing what chickens can eat helps you use kitchen and garden scraps wisely. 🐔 Food ✅ Safe for Chickens? 📝 Notes Lettuce Yes Great hydration source Berries (strawberries, blueberries) Yes High in antioxidants Oats (cooked or raw) Yes Good energy source Corn Yes Feed in moderation Mealworms Yes Excellent protein boost Cooked rice Yes Plain only, no salt or seasoning Watermelon Yes A favorite summer treat Pumpkin Yes Seeds act as a natural dewormer Cooked vegetables Yes Avoid heavily seasoned leftovers Apples Yes Remove seeds before feeding Sunflower seeds Yes High in fat, feed sparingly Eggs (cooked) Yes Do not feed raw or whole Keep treats and scraps to less than 10% of your flock’s total daily intake. Too many extras push balanced nutrition out of commercial feed. If you’re new to keeping chickens, you may also want to read 10 Questions Every New Chicken Keeper Asks, which covers many of the most common beginner concerns. What Not to Feed Chickens Some foods are toxic to chickens. Knowing what not to feed chickens can help keep your birds healthy and prevent serious illness or death. ⚠️ Food 🚫 Why It’s Unsafe Avocado Contains persin, which is toxic to birds. Chocolate Theobromine causes heart and nervous system damage. Moldy food Mold produces mycotoxins that can kill chickens. Raw beans Contain phytohemagglutinins, a deadly toxin. Salty foods Salt poisoning causes neurological symptoms. Green potatoes or peels Contain solanine, a toxic compound. Onions Can cause hemolytic anemia in large amounts. Citrus fruit May reduce egg production and cause digestive upset. Rhubarb leaves Contain oxalic acid, which is toxic. Dried or undercooked beans Carry the same toxin risk as raw beans. When in doubt, leave it
Best Chicken Breeds for Beginners: 7 Easy Chickens for Your Backyard Flock
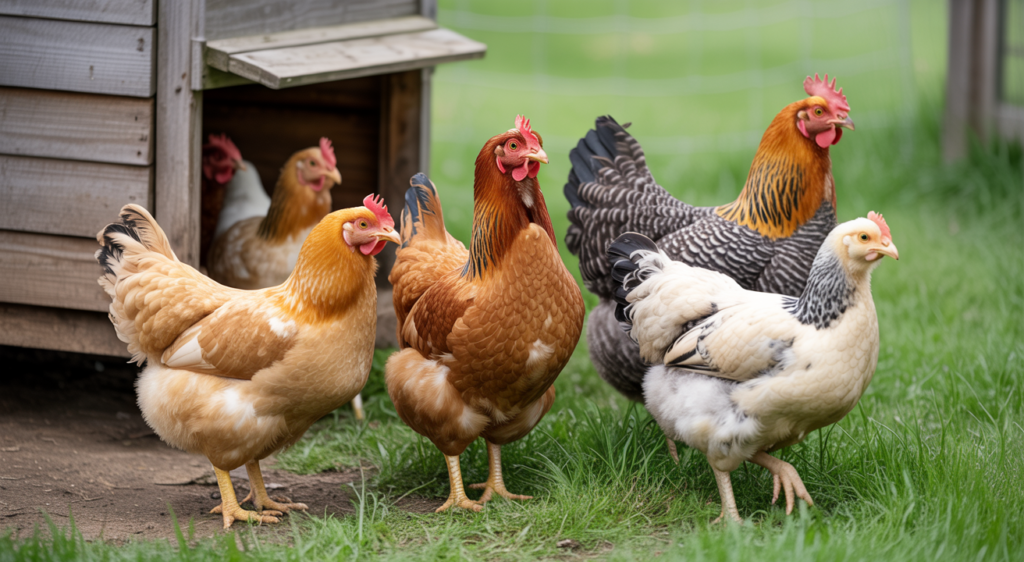
Choosing the best chicken breeds for beginners can make raising backyard chickens easier and more enjoyable. If you’re just starting out, our Complete Beginner Guide to Raising Backyard Chickens walks through everything from choosing breeds to building your first coop. Pick the wrong breed, and you may end up with a flock that is flighty, noisy, or unpredictable, but pick the right one, and you get calm birds that lay eggs consistently. Breed choice shapes your daily experience in many ways. A docile hen accepts handling without protest, a hardy bird survives cold snaps without extra heat, and a productive layer puts eggs on your counter three to five times a week. For beginner chicken keepers, these traits matter more than looks or novelty. In this article, I discuss the seven backyard chicken breeds that experts and experienced hobbyists most often recommend. I’ll also show you which breeds to skip at first, how to match a breed to your climate and space, and how many birds to start with. By the end, you will have a clear plan for your first flock. Quick Comparison of the Best Chicken Breeds for Beginners The following breeds are widely considered the best chicken breeds for beginners because they are hardy, friendly, and dependable egg layers. 🐔 Breed 🥚 Eggs Per Year 😊 Temperament 🌤️ Climate Tolerance Rhode Island Red 250–300 Calm, confident Very cold-hardy Plymouth Rock 200–280 Gentle, docile Cold-hardy Australorp 250–300+ Quiet, calm Adaptable Buff Orpington 175–200 Very gentle Cold-hardy Sussex 200–250 Curious, friendly Heat-tolerant Easter Egger 200–280 Friendly, active Adaptable What Makes a Chicken Breed Good for Beginners? Not all chicken breeds are equally suited to beginners. Some are calm, hardy, and productive, while others require more experience to manage. The easiest chicken breeds for beginners tend to share a few important traits that make them easier and more enjoyable to raise. Temperament is one of the most important characteristics to consider. Friendly chicken breeds tolerate handling, stay calm around children, and integrate well with other hens in the flock. Nervous or aggressive birds can create constant stress for both the flock and the keeper. Egg production also matters to many beginners because eggs are often the main reason people raise chickens. The best backyard breeds typically produce at least 200 eggs per year. That works out to roughly four eggs per hen each week, meaning a small flock of four hens can easily supply a household with fresh eggs. Hardiness refers to how well a breed handles weather conditions. Cold-hardy chickens tolerate freezing winters without extra heating, while heat-tolerant breeds cope better with hot summers. Choosing a breed suited to your climate reduces the amount of extra care your flock will need. Ease of care includes practical considerations such as noise level, space requirements, and tolerance for confinement. Some breeds adapt well to smaller backyard runs, while others prefer wide open spaces. Some hens are quiet neighbors, while others announce every egg with enthusiastic cackling. When you combine the traits of temperament, egg production, hardiness, and ease of care, you get the characteristics that define the best chicken breeds for beginners. The breeds listed below meet most or all of these standards. Best Chicken Breeds for Beginners These backyard chicken breeds are widely recommended for their combination of friendliness, productivity, and hardiness. Rhode Island Red The Rhode Island Red is one of the most recommended egg-laying chickens in the United States. A healthy hen lays 250 to 300 brown eggs per year. If you want to understand production differences between breeds, see our guide on How Many Eggs Do Chickens Lay. Temperament runs calm and confident. Rhode Island Reds are not pushovers, but they are not aggressive either. They tolerate handling and adapt well to new situations. Most beginners find them easy to work with from day one. These are hardy chicken breeds in cold climates. Their single comb is somewhat cold-sensitive, but the rest of the bird handles freezing temperatures without trouble. I recommend applying a protective coating to the comb, such as a moisture-resistant ointment specifically made for poultry. Reds are active foragers and do well with space to roam, though they also manage in a well-sized run. Beginners who want reliable egg production and low drama will find Rhode Island Reds a solid first choice. Plymouth Rock Plymouth Rocks, often called Barred Rocks, are a beautiful bird with striking black-and-white striped feathers. These are among the friendliest chicken breeds you can raise, and they actively seek out human interaction, often following their owners around the yard. I can’t go outside without an entourage of clucking black and white hens. This is one of the best backyard chicken breeds for families. Plymouth Rocks tolerate children well and rarely peck or scratch. They stay calm during handling, which makes routine health checks simple. Egg production is reliable. Expect 200 to 280 brown eggs per year from a good hen. Plymouth Rocks also lay through winter better than many breeds, so your production stays steady when daylight drops. These are genuine backyard chicken breeds built for small farms and suburban coops. They adapt to confinement without becoming stressed and do well in both warm and cold climates. Australorp The Australorp holds a world record for egg production. In 1923, one Australorp hen laid 364 eggs in 365 days (Livestock Conservancy). Modern production averages 250 to 300 eggs per year, making these some of the best egg-laying chickens available to backyard keepers. Australorps are quiet and calm. They rarely cause problems within the flock and accept new birds more easily than many breeds. Their temperament makes them a good fit if you plan to expand your flock over time. Adaptability is another strong point as the Australorps handle both cold winters and warm summers better than most dual-purpose breeds. Originating in Australia, the Australorps easily handle the wildly swinging temperatures. For beginners who want maximum egg production combined with an easygoing bird, the Australorp is hard to beat. Buff Orpington
Complete Beginner Guide to Raising Backyard Chickens
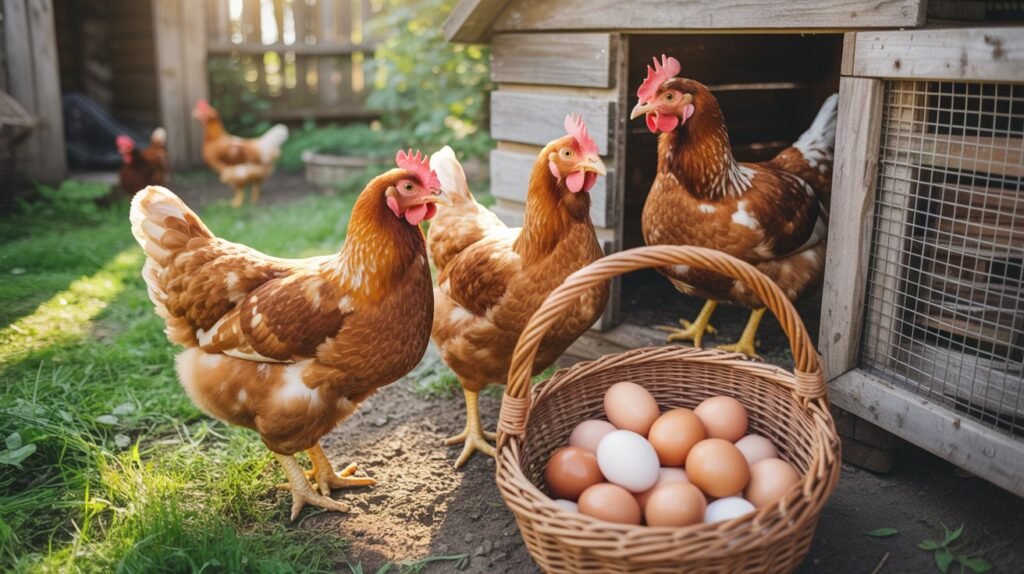
Backyard chickens have gone from a rural tradition to a suburban staple. Across the United States, millions of households now keep small flocks in their yards. The reasons are practical: fresh eggs every morning, natural pest control, and a surprising amount of entertainment from birds with their own personalities. Believe me, just the idea of raising backyard chickens for the first time feels like a daunting task. If you’re wondering how to raise backyard chickens successfully, the process is actually simpler than most beginners expect. There are breeds to choose, coops to build, feed to buy, and local rules to research. This guide covers every step so you can start with confidence. Chickens are forgiving animals. Most beginners get it right, and the ones who struggle early usually do so for avoidable reasons that this guide will help you skip. Why Raise Backyard Chickens? The most obvious reason people start raising chickens for eggs is the steady supply they get from their own backyard flock. This is possibly one of the best reasons for having a productive backyard flock. A healthy hen lays roughly 250 to 300 eggs per year during her peak years, and you can’t beat food that goes directly from source to kitchen. Store-bought eggs spend days in transit before even reaching a shelf. Backyard eggs go from nest to kitchen the same day. Then there’s the plus side of the rich, dark yolks, because you control what your birds eat. The benefits of owning backyard chickens go far beyond the breakfast table. Chickens are your own personal pest control, eating beetles, grubs, ticks, and fly larvae. A small flock working through a garden bed significantly reduces pest control pressures. Plus, you have the added benefit of mixing their droppings with bedding material like straw, along with vegetables and other plant materials. These break down into one of the best garden fertilizers available. Gardeners who keep chickens often stop buying fertilizer entirely. We’ve owned chickens for years, and our children have always found them to be engaging pets. Each bird behaves differently and has a very distinct personality. Some breeds are calm and easy to handle, others are bold and curious. Children who help care for your flock learn responsibility in a concrete way, while the chickens provide a tangible return on the feed you buy. Just another reason to own a backyard flock. Check Local Laws Before Getting Chickens Before buying a single chick, spend an hour checking your local rules. Many cities and counties allow backyard chickens with restrictions, and some ban them outright. Getting this wrong means rehoming birds you have already bonded with. Here is what to look for: Your city or county website usually lists this information under zoning or animal control. A quick call to your local zoning office confirms anything unclear. This step takes less than an hour and prevents serious problems later. ⬆ Back to top How Many Chickens Should Beginners Start With? Three to six chickens is the right range for most beginners. A flock of three gives you enough eggs for a small household and enough social dynamics to observe. Six birds produce more eggs and give you a buffer if one hen stops laying or gets sick. Chickens are social animals. A single chicken kept alone will be stressed and unhappy. Two is a minimum. Three or more is better. If you want enough eggs to share with neighbors or family, four to six hens is a practical target. Here is a rough guide to weekly egg output based on flock size, assuming healthy hens of good laying breeds: 🐔 Number of Chickens 🐔 Estimated Eggs Per Week 3 12 to 15 4 16 to 20 6 24 to 30 These numbers reflect prime laying years. Production drops in winter, during molting, and as hens age past three or four years. Start with the number that fits your household needs, and plan your coop space around your target flock size. Best Chicken Breeds for Beginners 🐔 Chicken Breed 🥚 Eggs Per Year 🐔 Temperament Rhode Island Red 250–300 Hardy, confident, sometimes assertive Plymouth Rock 200–250 Friendly, calm, family-friendly Australorp 250–300 Quiet, gentle, excellent layers Buff Orpington 180–220 Very friendly, docile, great for children Sussex 230–250 Curious, active, adaptable Breed choice is a key factor in building a backyard flock. Some breeds are docile and easy to handle, while others are flighty or aggressive. For a first flock, know what the best chicken breeds for beginners are, and pick breeds known for calm temperament, consistent egg production, and adaptability to your climate. Rhode Island Red Rhode Island Reds are among the most popular backyard breeds in America. They lay large brown eggs reliably, often 250 to 300 per year. They tolerate cold well and adapt to both confinement and free-ranging. They can be assertive in the flock hierarchy but are generally manageable for beginners. I do not recommend keeping Rhode Island Red roosters, as they can be bullies in the pen. The hens can sometimes have aggressive spells, but they are worth any extra work of separating them if that happens. You just can’t beat this breed for their ability to lay large, brown eggs. Plymouth Rock Plymouth Rocks, often called Barred Rocks, are calm, friendly, and dependable. They lay around 200 brown eggs per year and handle cold weather well. They are one of the best breeds for families with children because they tolerate handling without much fuss. Australorp Australorps hold the world record for egg production: 364 eggs in 365 days from one bird, but on average, the Australorps lay 250 or more eggs per year. They are gentle, quiet, and do well in small backyards. Buff Orpington Orpingtons are the golden retrievers of the chicken world, and another favorite of mine. They are large, fluffy, calm, and friendly. And even though they are large birds, I consider them among the best to have around children. Buffs lay around 200 brown eggs per year
Chickcozy Automatic Chicken Coop Door Review
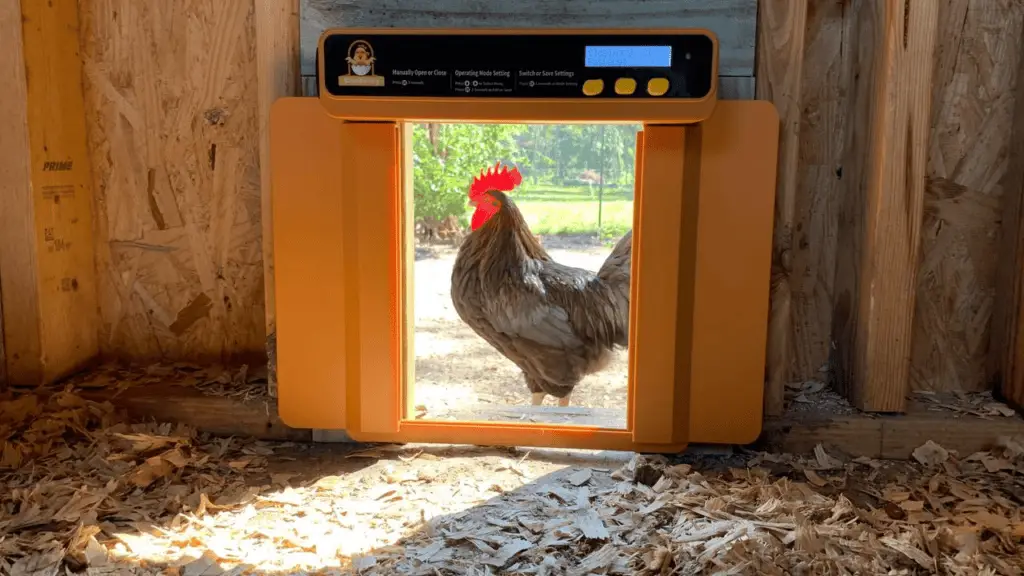
Disclosure: This post may contain affiliate links. If you purchase through these links, I may earn a small commission at no extra cost to you. Ensuring their safety and well-being is a top priority when keeping chickens. Installing a convenient and reliable coop door is one of the most important aspects of maintaining a secure chicken coop. The Chickcozy Automatic Chicken Coop Door offers the perfect solution, with innovative features that set it apart from traditional chicken coop doors. In this review, I discuss its key features, such as its all-season suitability, easy installation, and performance, and I offer comparisons to similar products on the market. In This Review Why a Good Chicken Coop Door Matters Having a functional chicken coop door is essential for several reasons: Features of the Chickcozy Automatic Chicken Coop Door The Chickcozy Automatic Chicken Coop Door offers a range of features that make it an excellent option for your backyard chickens: With these features and its innovative design, the Chickcozy Automatic Chicken Coop Door addresses coop owners’ specific challenges and offers convenience with peace of mind. Easy Installation and Setup Process The Chickcozy Automatic Chicken Coop Door installation was easier than I expected it to be. It is straightforward and can be accomplished with basic tools and minimal technical expertise. Here’s a step-by-step guide to help you through the installation: I recommend the following tips for an installation with fewer hassles: Setting up the Chickcozy Automatic Chicken Coop Door follows a similar process. However, if you’ve never installed a garage door opener before, don’t worry. The process is much more straightforward and less time-consuming than changing a garage door opener for your home. Following these guidelines, you can efficiently install the Chickcozy Automatic Chicken Coop Door and address common challenges while ensuring proper alignment and functionality. Performance and Durability The door performed reliably during testing, providing secure protection from predators and withstanding weather conditions. With the unexpected rainstorms we have experienced this year, the Chickcozy performed well, closing and opening efficiently during scheduled times and when we operated it manually. The horizontal mechanism ensured the coop remained tightly shut at night and during storms, offering a secure environment for our flock. Pros and Cons Pros: Cons: Comparison to Other Automatic Coop Doors Compared to other automatic coop doors, the Chickcozy door offers: Conclusion The Chickcozy Automatic Chicken Coop Door is an excellent choice for chicken coop owners. This sturdy little door offers standout features such as a horizontal opening mechanism, built-in safety sensors, and multiple operational modes. Its ease of installation, reliable performance, and competitive pricing make it a good investment for ensuring the safety and security of your chickens. For more information, visit Chickcozy.
Internal Egg Laying In Chickens: Prevention And Solutions
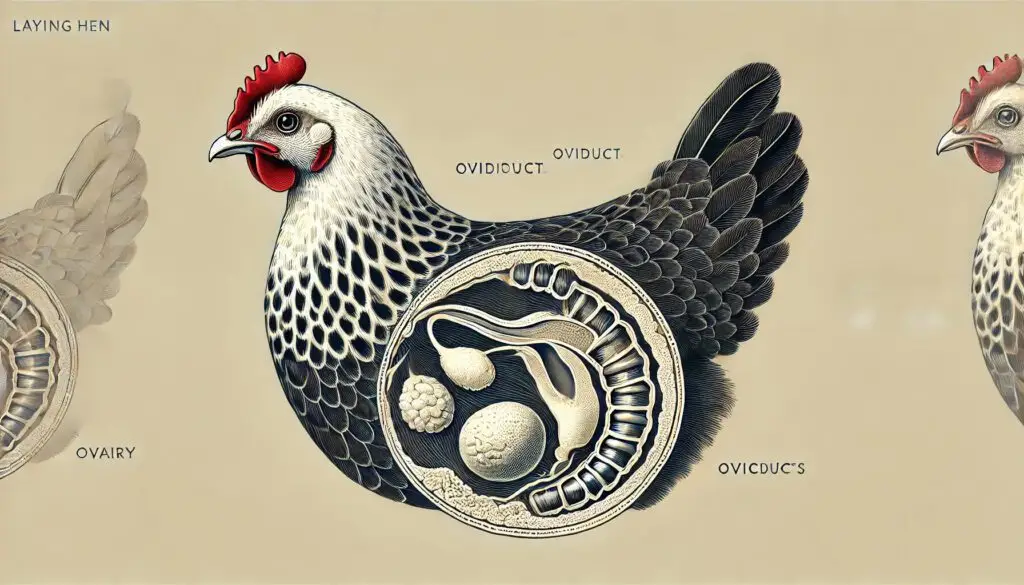
Disclosure: This post may contain affiliate links. If you purchase through these links, I may earn a small commission at no extra cost to you. Many backyard chicken farmers find their chickens’ egg laying slowing or stopping altogether during the summer. While the first thought is to attribute it to the extreme heat we suffer each year, it may not be why some of your hens stop laying. Internal egg laying in chickens is not a common condition, but it is a possibility and can occur from oviduct trauma, infection, or genetic defects. What is Internal Egg Laying? Internal egg laying in chickens is a serious condition in which eggs are retained inside the hen’s body instead of being expelled normally. This condition poses significant health risks, including infections and internal damage, and can even be fatal if not promptly addressed. Understanding internal egg-laying is not just important; it’s crucial for maintaining the health and productivity of your flock. As a backyard chicken farmer, recognize the signs of internal egg-laying early. Factors such as genetic predispositions, environmental stressors, inadequate nutrition, and underlying health issues can all contribute to this condition. By being proactive and intervening promptly when you notice signs like lethargy, decreased appetite, a swollen abdomen, and difficulty walking, you can prevent severe complications and ensure the health of your flock. Preventing internal egg-laying involves several proactive measures. Ensuring a balanced diet rich in calcium and other essential nutrients supports proper egg formation and laying. Maintaining a stress-free environment with adequate space, appropriate lighting, and minimal disturbances helps reduce the risk of internal laying. However, it’s not just about prevention. Regular health check-ups and monitoring are equally important. They provide reassurance that your flock’s health is being cared for, catching early signs of trouble and allowing for timely medical intervention. This regular care is a testament to your responsibility as a backyard chicken farmer, ensuring the well-being of your flock. Solutions for internal egg laying often require veterinary care, including manual egg removal, antibiotics to prevent infection, and, in severe cases, surgical intervention. Post-treatment, it is vital to address the underlying causes to prevent recurrence. This diligent commitment to your flock’s health is critical to being a responsible backyard chicken farmer. Poultry farmers can effectively manage internal egg laying by understanding the causes, implementing preventative measures, and seeking timely solutions. This approach ensures the welfare of the hens and supports the poultry operation’s overall productivity and economic viability. Understanding the Causes of Internal Egg Laying Internal egg laying in chickens is a serious condition in which eggs are retained inside the hen’s body instead of being expelled normally. This condition poses significant health risks, including infections and internal damage, and can even be fatal if not promptly addressed. Understanding internal egg-laying is not just important; it’s crucial for maintaining the health and productivity of your flock. Various factors, including genetic predispositions, environmental stressors, inadequate nutrition, and underlying health issues, can cause internal egg-laying. Recognizing the signs early, such as lethargy, decreased appetite, a swollen abdomen, and difficulty walking, and intervening promptly can prevent severe complications. This proactive approach is a testament to your responsibility as a backyard chicken farmer. Preventing internal egg-laying involves several proactive measures. Ensuring a balanced diet rich in calcium and other essential nutrients supports proper egg formation and laying. Maintaining a stress-free environment with adequate space, appropriate lighting, and minimal disturbances helps reduce the risk of internal laying. However, it’s not just about prevention. Regular health check-ups and monitoring are equally important. They provide reassurance that your flock’s health is being cared for, catching early signs of trouble and allowing for timely medical intervention. Solutions for internal egg laying often require veterinary care, including manual egg removal, antibiotics to prevent infection, and, in severe cases, surgical intervention. Post-treatment, it is vital to address the underlying causes to prevent recurrence. Poultry farmers can effectively manage internal egg laying by understanding the causes, implementing preventative measures, and seeking timely solutions. This approach ensures the welfare of the hens and supports the poultry operation’s overall productivity and economic viability. Chicken Breeds Less Likely to Suffer from Internal Egg Laying table { width: 100%; border-collapse: collapse; } th, td { padding: 15px; text-align: left; border-bottom: 1px solid #ddd; } th { background-color: #4CAF50; color: white; } td { background-color: white; color: black; } tfoot td { background-color: #4CAF50; color: white; text-align: center; } Chicken Breeds Less Likely to Suffer from Internal Egg Laying Breed Characteristics Rhode Island Red Hardy and robust, excellent layers of brown eggs. Sussex Docile and friendly, good egg production and dual-purpose breed. Australorp Known for their high egg production and calm temperament. Plymouth Rock Reliable layers, hardy in various climates, good dual-purpose breed. Wyandotte Resilient and good layers, known for their beautiful plumage. Orpington Gentle and friendly, decent layers and excellent for meat production. Leghorn Prolific layers of white eggs, active and hardy birds. Brought to You By thepreppersbasement.com Early Detection and Diagnosis Internal egg laying in chickens can lead to severe health complications if not detected early. Identifying the signs and symptoms promptly is essential for protecting the health of your flock. Here are the key points to watch for and steps to take: Behavioral Changes: Physical Symptoms: Veterinary Consultation: Record Keeping: Understanding Risk Factors: By being vigilant and proactive, poultry farmers can significantly reduce the impact of internal egg laying on their flock, ensuring the health and productivity of their chickens. Preventative Measures for Poultry Farmers Preventing internal egg laying in chickens helps maintain flock health and farm productivity. Proactive measures can significantly reduce the incidence of this condition and its adverse effects. Establishing a Conducive Living Environment Creating a clean, safe, spacious coop with adequate ventilation is the first step in preventing many issues with your flock’s health. Ensuring access to natural light and maintaining a regular light-dark cycle supports the hens’ circadian rhythms, essential for regular egg-laying patterns. A well-maintained environment reduces stress, a significant factor in preventing internal egg-laying.
Chicken Breeds For Hot Climates
One overlooked aspect of backyard chicken farming is choosing the right chicken breeds for hot climates. Your breed choices impact the well-being and productivity of your flock, which in turn affects the sustainability and profitability of your farm. Hot environments, typically characterized by temperatures ranging from [86-104 °F] and high humidity, present unique and significant challenges. The relentless heat and high humidity can severely test the resilience of chickens, potentially limiting their growth and egg-laying capabilities. However, nature has provided certain chicken breeds with unique characteristics that enable them to survive and thrive in these intense conditions. Selecting the right breed benefits the chickens, ensuring their health and ability to produce eggs or meat. In this guide, I will empower you to discover which breeds are best for you and why. Then, we’ll explore how you, as a responsible farmer, can keep your flock healthy and productive despite climate challenges. It’s important to note that this knowledge is not exhaustive, and local farmers and traditional farming practices often have valuable insights that can enhance your understanding and guide your decisions. Key Benefits of Choosing Heat-Tolerant Chicken Breeds Characteristics of Heat-Tolerant Chicken Breeds Selecting chicken breeds that can thrive in hot climates is crucial for maintaining their health and ensuring sustainable farming. Here are the characteristics that make certain breeds suitable for warm environments: Choosing chickens with these characteristics isn’t just a matter of comfort; it translates into sustainability. When chickens are well-adapted to their environment, they maintain higher productivity, which means consistent egg-laying and healthy growth with less need for interventions. Sustainable farming practices are crucial in today’s world. By opting for breeds that naturally cope with heat, you’re reducing the reliance on electricity for cooling systems and contributing to an eco-friendly operation. This decision supports not only the welfare of your chickens but the health of our planet as well. Top Chicken Breeds for Hot Climates Investing in the right chicken breed is crucial for a thriving poultry farm in hot climates. Based on extensive research and interaction with various breeds, here are the top contenders that not only survive but also excel under such stressful conditions: Caring for Heat-Tolerant Chickens in Hot Climates Even the sturdiest chicken breeds need proper care to thrive in hot conditions. Here are some key strategies for maintaining a healthy flock when the mercury rises: Common Issues and Solutions for Chickens in the Heat Raising chickens in intensely hot conditions comes with its own set of challenges. Beyond selecting the right breed, you need to know how to recognize and remedy heat-related issues to keep your flock healthy. ?️ Common Issues and Solutions for Chickens in the Heat ? Heat Stress This can sneak up on chickens, showing symptoms like panting, spreading wings, lethargy, and reduced egg production. Stay vigilant, especially during heat waves. Dehydration Ensure your chickens have constant access to fresh, clean water. Supplementing their diet with electrolytes on extremely hot days can help them maintain balance. Disease Diseases thrive in warm, moist environments, so manage coop cleanliness and humidity. Regular coop cleaning and proper ventilation will help prevent the spread of illness. Emergency Response Your quick response can save lives during emergencies. Immediate steps include moving the affected bird to a cooler location, providing cool water, and avoiding sudden temperature changes to prevent shock. Brought to You by thebackyardchickenfarmer.com Remember, prevention is vital. You can effectively manage your flock’s well-being through the summer by recognizing the early signs of heat stress, addressing hydration needs, and maintaining a clean, well-ventilated coop. With these strategies in hand, you’re well-equipped to ensure the success of your poultry farm in hot and humid climates. Final Thoughts: Mastering the Art of Breed Selection for Your Climate Choosing suitable chicken breeds to raise in hot climates transcends personal preference. It’s a pivotal decision that directly impacts the welfare of your birds and the prosperity of your poultry venture. This choice is not just about the present, but it’s an investment in the future of your farm. Understanding the specifics of your local climate is a game-changer. This involves thoroughly analyzing temperature patterns, humidity levels, and the severity of extreme weather conditions during different seasons. It’s about being in tune with nature’s rhythm and using that knowledge to your advantage. Selecting a chicken breed well-suited to your climate does more than ensure the birds’ comfort and health. It optimizes their productivity for egg laying, meat production, or both. Remember, the vitality of your flock is a direct reflection of the sustainability and profitability of your poultry farming efforts. Heat-tolerant chicken breeds testify to the power of working in harmony with nature rather than against it. I strongly recommend networking with local poultry experts. Their insights can prove invaluable, offering recommendations tailored to your specific situation. They can share their experiences and provide insights into your region’s breed selection and effective care strategies. This kind of knowledge sharing is a cornerstone of successful farming. My guide, Complete Beginner Guide to Raising Backyard Chickens, will help you learn what you need to choosing the right chickens. In the end, the well-being of your chickens and the success of your farming practice hinge on informed decisions grounded in a deep understanding of the local environment. So, choose thoughtfully and prioritize the welfare of your poultry, and your diligence will be rewarded with a thriving flock despite the challenging climate. Remember, every decision you make today will shape the future of your poultry farm. So, let’s make those decisions count.
Sustainable Urban Homesteading: Learning to Preserve Food
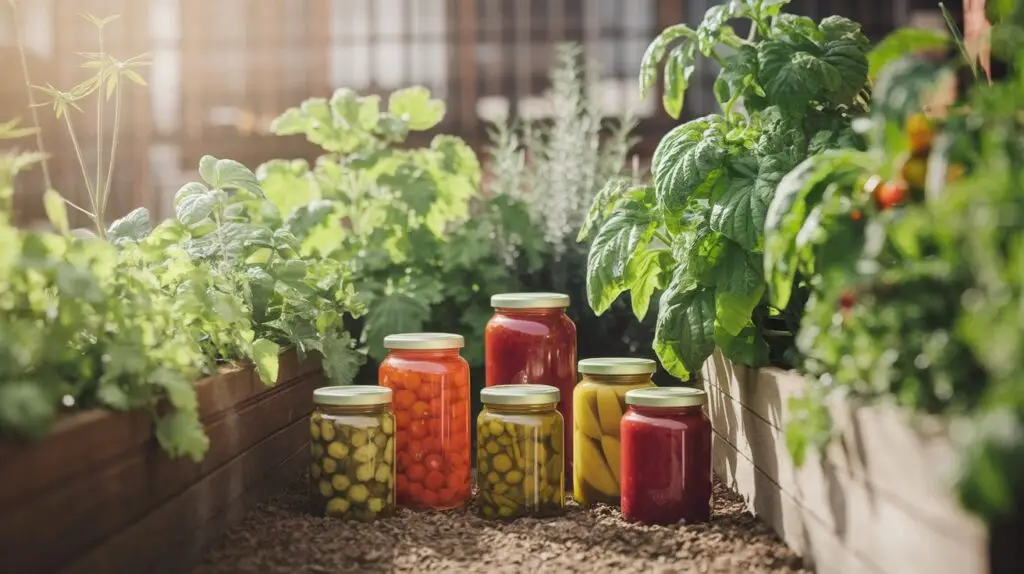
In the bustling landscape of modern life, where convenience often reigns supreme, the art of food preservation without refrigeration is experiencing a revival within urban homesteading circles. This resurgence is fueled by economic considerations and an awareness of the health risks associated with mass-produced foods. Salt, sugar, trans-fats, and artificial additives in commercial products have spurred individuals to seek alternatives. The practice of preserving food at home emerges as an appealing solution. It offers a healthier alternative and the practical advantage of enjoying seasonal fruits and vegetables year-round. By eschewing harmful preservatives and embracing traditional preservation methods, urban homesteaders can savor the natural flavors of their produce, fostering a deeper appreciation for the natural world and its cycles while contributing to a more sustainable and self-reliant lifestyle. This guide covers preserving fruits and vegetables, but I will delve into processing other foods in future guides. Reasons for the Revival The rise of backyard gardens and the abundance of excess produce have challenged urban homesteaders to make the most of their harvests without contributing to food waste. Simultaneously, the health risks of commercially processed foods, laden with additives that compromise taste and well-being, have become a growing concern. In this context, the revival of food preservation is not just a solution but a practical and empowering response to these contemporary challenges. It offers urban homesteaders a pathway to sustainability and self-sufficiency while prioritizing wholesome, natural ingredients. Simple Preservation Techniques Mastering the art of food preservation is an essential skill in the quest for sustainable living and self-sufficiency. Simple yet effective techniques allow individuals to extend the shelf life of fresh produce, ensuring nothing goes to waste while enhancing their meals’ flavor and nutritional value. From the ancient practice of sun-drying fruits and vegetables to the tangy delights of homemade pickles and the timeless tradition of canning, various preservation methods await exploration. This guide will dive into these fundamental techniques, offering practical insights and step-by-step instructions to empower you on your preservation journey. Whether you’re a novice homesteader eager to embark on your preservation adventure or a seasoned enthusiast seeking to expand your culinary repertoire, these methods promise to unlock a world of flavor and sustainability. Explore the simplicity and ingenuity of drying, pickling, and canning as we discover the secrets to preserving nature’s bounty for year-round enjoyment. Tips for Successful Preservation Preserving food is not just a culinary endeavor; it’s a commitment to sustainability and self-sufficiency. Starting with the right foundation is crucial for a successful preservation journey. This begins with selecting the freshest, highest-quality ingredients available, ensuring that the flavors and nutrients are preserved at their peak. Investing in top-notch preserving equipment, such as sturdy glass jars and reliable lids, is essential to maintaining food safety and extending shelf life. In the following section, we’ll delve into essential tips and strategies for successful food preservation, equipping you with the knowledge and tools needed to preserve nature’s bounty with confidence and finesse. Recommended Suppliers For those looking to embark on their preservation journey, reputable home goods suppliers like Wares of Knutsford offer a range of functional and aesthetically pleasing preserving equipment. Here is a list of reputable suppliers for home food preservation tools: Conclusion By embracing traditional food preservation techniques, urban homesteaders can enjoy the satisfaction of reducing food waste, improving health, and savoring the natural flavors of home-preserved foods. Ready to embark on your preservation adventure? Let quality ingredients and reliable equipment be your guide. ???