
Inexpensive Food Storage Expansion – Day 2
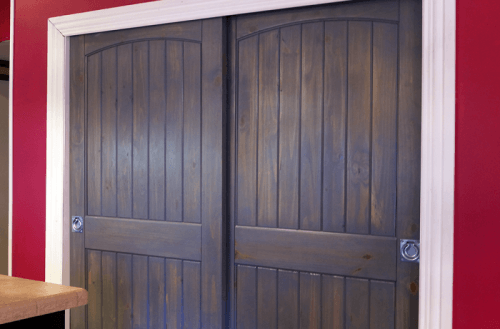
Day 2 Came Bright and Early Where We Left Off On day one of building an inexpensive food storage pantry, we left off with all the framing done, the sheetrock up, and the door runner hung. All that was left was to finish up the cosmetic work, such as sanding down the edges, filling nail holes, and making sure everything was ready for primer and paint. It still amazes me that we moved so quickly with this pantry, with only 2 people working on it. While hubby Charles can do all types of crafty things around the house, carpentry is not his forte. So we hired Scott to help him out, especially when it came to hanging the doors. Now I can’t say enough good things about Scott; dependable, affordable, and very good. So, if you need some odd jobs done around the house, Scott is the one to talk to (he even lets husbands help him). I found Scott on Angie’s List, listed under Scott’s Handyman Service. He farms for a living, doing this on the side, so you may have to wait a little bit, but his service is so worth it. However, he was only 1 week out when we scheduled ours. Ready for Finishing The hard part is done, the walls have two coats of primer, it’s time for shelving, paint and trim. And the Final Product Giving up my desk, which I never used, was a worthwhile sacrifice. Losing a space that was not really big enough for a desk, gave us a pantry 3 times larger. If we had done all the work ourselves, we would have saved even more. However, using recycled, reclaimed, and seconds, our material cost was around $500. [ultimatetables 4 /]
Inexpensive Food Storage Expansion – Day 1
It was called a pantry, but as small as it was, I called it a broom closet for food. The Broom Closet Pantry Before Homely little thing, isn’t it (and I stress little)? Not to mention, barely enough room to store a month’s worth of food. Actually, I love to cook for family and friends, and that requires storage room, which I didn’t have. And did I tell you, I also love to can and preserve food in various ways? So What Did We Do? I Gave Up My Desk 3 years ago, I made the move from desktop to laptop. With that switch, came the unused desk, aka “catch-all”. Built into the wall next to the pantry, the desk served its purpose, for a time. It did give me some small cabinets above, but nothing to write home about in the storage for food issue. When I came home from work, about 6 months ago, my husband met me at the door and said, “I just had a brain storm.” Now, I don’t know about you, but when my husband says something like that, I want to run. All I could say was, “Uh oh!” His answer? “Don’t worry, it’s a great idea.” Uh oh…….. Needless to say, I was wrong (thank goodness). He had a great idea for an inexpensive food storage expansion by removing the desk, extend the pantry; so simple yet ingenious. So I picked up a couple extra freelance jobs, we bought the material and off we went. Step 1: Tear it Down Going, Going, Gone I think this was the hardest part about the whole project, mainly because it was so messy; sheet rock dust everywhere. But, I must admit, it was kind of fun taking a swing at the wall. Step 2: Framing it In Framing Going Up The framing was completed the first half of day one. It surprised me how quickly it went up and it was relatively easy to do. Step 3: Now the Walls Sheet Rock Walls are Up Track for Sliding Barn Style Doors This was the last job at the end of day one. It went a lot smoother than we anticipated and much quicker. Look for my “Day 2” post to see the final results and a rundown of what we spent. With a little research and some creative ideas, it cost a lot less than what you might think.