Brooder Setup for Baby Chicks (Complete Beginner Guide)
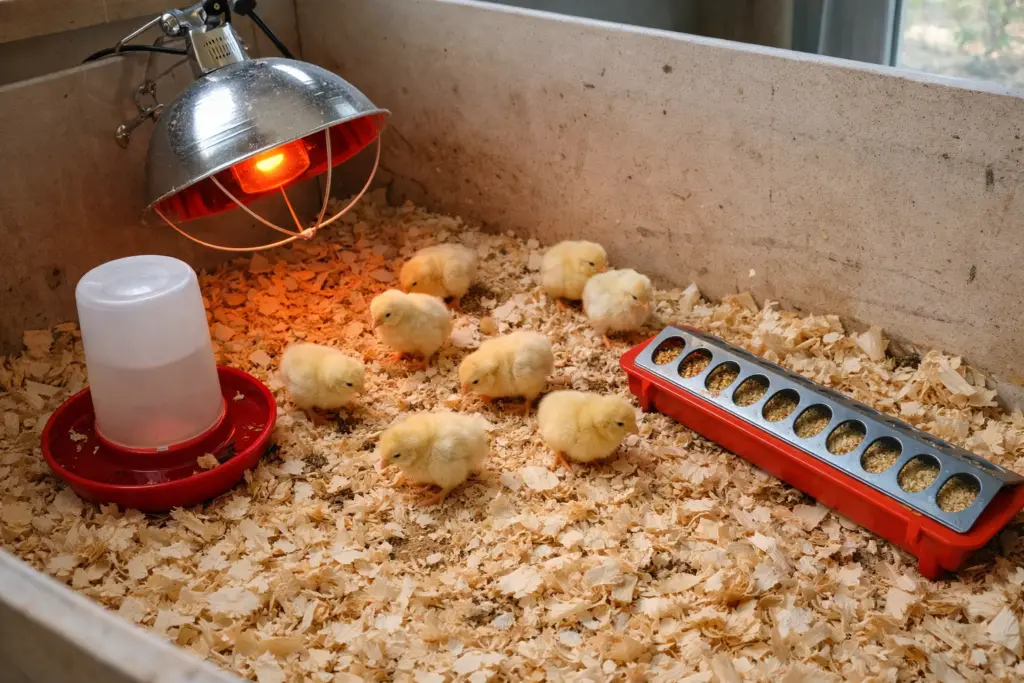
Disclosure: This post may contain affiliate links. If you purchase through these links, I may earn a small commission at no extra cost to you. Setting up a brooder is one of the most important steps in raising baby chicks, and it is where many beginners either set themselves up for success or run into avoidable problems. A good brooder gives chicks a stable, comfortable environment where they can grow quickly without stress. At the same time, a poorly set-up one can lead to issues with temperature, moisture, or overcrowding. You want a space that provides consistent warmth, clean bedding, easy access to food and water, and enough room for chicks to move freely as they grow. Once those basics are in place, raising chicks becomes much easier to manage day to day. If you have not purchased your chicks yet, start with our Where to Buy Baby Chicks article. The next article in the series, the Raising Baby Chicks for Beginners guide, will walk you through daily care once your brooder is up and running. What Is a Chick Brooder A brooder is a contained space that replaces the role of a mother hen during the first few weeks of a chick’s life. In nature, a hen provides warmth, protection, and guidance. In a backyard setup, your brooder takes over that job. This space needs to stay warm, dry, and safe at all times. Chicks will eat, drink, sleep, and grow inside it, so the setup should support those basic needs without causing stress or confusion. Step 1: Choose the Right Brooder Container You do not need anything complicated or expensive to get started, but the container you choose does need to work well for the space you have and the number of chicks you plan to raise. Many backyard chicken keepers use large plastic storage totes, stock tanks, wooden boxes, or livestock troughs. What matters most is that the sides are solid enough to block drafts and tall enough to prevent chicks from jumping out as they grow and become more active. Space is often underestimated at this stage. Chicks grow quickly, and a brooder that feels roomy during the first week can become crowded by three weeks. Giving your chicks enough space from the beginning helps reduce stress, limits pecking behavior, and keeps the environment cleaner. Step 2: Add Safe, Absorbent Bedding Bedding is more than just something to cover the floor. It plays a major role in keeping chicks dry, comfortable, and healthy. Pine shavings are among the most reliable bedding options because they absorb moisture well and provide a textured surface that helps chicks maintain proper footing. Slick flooring, like plastic and plain newspaper, can contribute to leg problems. A thick layer of pine shavings is vital to keeping your chicks safe and healthy and to avoiding long-term issues. The bedding also makes it easier to spot-clean wet areas and keep the brooder from developing odor problems. Learn more about the best bedding for your chicken coop in our Chicken Coop Bedding Guide for Beginners. Step 3: Install a Heat Source Correctly Heat is the most critical element in your brooder setup, especially during the first week. Typically, chicks will need this heat source for 4-6 weeks or until they get all their feathers. Since chicks cannot regulate their body temperature when young, they rely entirely on an external heat source. Without consistent warmth, they can become chilled, leading to stress and potential loss. Heat lamps are commonly used and can work very well when installed correctly. Brooder heat plates are another option that provides a more controlled and lower-risk heat source. The key is placement. The heat source should warm only part of the brooder, not the entire space. This creates a temperature gradient, allowing chicks to move toward warmth when they need it and away from it when they do not. Step 4: Set the Correct Temperature Temperature should always be measured at chick level, not above the brooder. During the first week, aim for about 95°F in the warm zone, then gradually reduce the temperature each week as chicks develop feathers and become more independent. 🐣 Age 🌡️ Temperature 📌 What to Watch Week 1 95°F Chicks spread evenly and stay active Week 2 90°F Less clustering, more movement Week 3 85°F Feather growth increases Week 4 80°F More independence Week 5–6 75°F Preparing for outdoor transition Watching chick behavior is just as important as checking the thermometer. Comfortable chicks will move freely, eat, drink, and rest without crowding or avoiding specific areas. Step 5: Add Feeders and Waterers Chicks need constant access to clean feed and water, and where you place them in the brooder affects how well they use them. Use chick-sized feeders and shallow waterers designed for safety. If the water is too deep, young chicks can fall in and drown. Place them slightly away from the heat source so chicks do not crowd into one area, which helps reduce spills and keeps bedding drier. 💡 Beginner Tip Keep feed and water slightly separated inside the brooder. This helps reduce spills and keeps bedding drier longer. Step 6: Plan the Brooder Layout A well-planned layout gives chicks options and keeps the space balanced. Position the heat source on one side, place feed and water in an accessible area nearby, and leave open space for movement. This setup allows chicks to regulate their own comfort and reduces stress within the group. Even a simple layout works well when each element is placed with purpose. Step 7: Test Everything Before Chicks Arrive Before bringing chicks home, run the brooder for several hours and check that everything works as expected. Look at temperature stability, equipment placement, airflow, and overall safety. Making adjustments ahead of time is much easier than trying to fix problems after chicks are already in the brooder. Brooder Safety (Do Not Skip This) Safety deserves careful attention, especially when using heat lamps. Secure the lamp firmly so it cannot
Chicken Coop Bedding Guide for Beginners
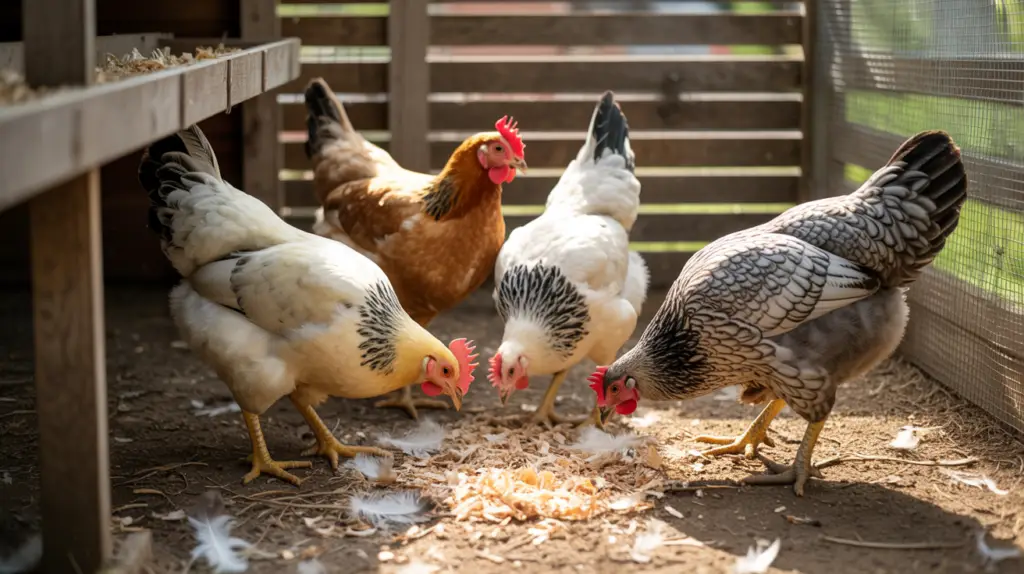
Disclosure: This post may contain affiliate links. If you purchase through these links, I may earn a small commission at no extra cost to you. If your chicken coop smells bad or looks messy, bedding is usually the reason. Most beginners don’t think much about bedding at first, focusing on the coop, the chickens, and the feed. Then, after a few weeks, the coop starts to smell, the floor gets damp, and eggs show up dirty. The good news is that this is an easy fix. Once you understand how bedding works and what to use, keeping your coop clean becomes simple and predictable. What Is Chicken Coop Bedding and Why It Matters Chicken coop bedding is the material you spread on the floor of your coop and inside nesting boxes. It does more than look nice. It keeps your flock comfortable, warm, and healthy. Good bedding absorbs moisture from droppings, controls odor, and helps keep your chickens dry. It also makes cleaning much easier because you are removing bedding instead of scraping waste off hard surfaces. Plus, if you are a gardener, using the mucked-out straw is one of the best things you can put in your compost pile for later garden fertilization. If you are still setting up your coop, make sure you start with the basics in our Complete Beginner Guide to Raising Chickens, which walks through everything you need before your birds arrive. When bedding is wrong or poorly managed, problems show up fast. Not only do you get strong smells, but you get wet spots, flies, and a higher risk of illness in your flock. When you get your coop right, your entire setup runs smoother. Best Bedding Options for Backyard Chickens There is no single perfect bedding option, but a few work well for beginners. Pine Shavings (Most Popular Choice) Pine shavings are the go-to bedding for most backyard chicken keepers. They are easy to find, affordable, and do a great job absorbing moisture. They also help control odor better than most other options. Pine shavings work well on coop floors and inside nesting boxes. They are lightweight and easy to remove during cleaning, antimicrobial, and easy to find. Avoid cedar shavings. Cedar gives off oils that can irritate a chicken’s respiratory system. Straw Straw is another common choice, especially in rural areas where it is easy to find. It provides good insulation and works well in colder weather, and chickens also like to scratch through it. The dry, hollow stems of straw absorb moisture well and are a good insulator, keeping nesting boxes dry and comfortable. This moisture-wicking keeps eggs clean and free of mold and bacteria. Straw also protects hens and their eggs from extreme cold temperatures. Hemp Bedding Hemp bedding is becoming more popular, especially for small backyard flocks. Its softness, absorbency, and moisture control make it a good choice for nesting boxes. It is also low-dust and lasts longer than pine shavings, meaning less cleaning. However, hemp is considerably more expensive and harder to source locally. If you want a low-maintenance setup and do not mind spending a little more, hemp is a strong option. Sand (Advanced Option) Some chicken keepers use sand instead of traditional bedding. Sand drains well and does not hold moisture like wood-based bedding. It is easy to clean by scooping droppings the same way you would clean a litter box. However, sand is heavy and can be difficult to manage. It also gets cold in winter, which may not be ideal in colder climates. For most beginners, sand is not recommended for beginner backyard chicken farmers. But if you have a little more experience or are willing to deal with the learning curve, it can work well in dry areas. Bedding Comparison 🐔 Bedding Type 👍 Pros ⚠️ Cons ⭐ Best For Pine Shavings Absorbent, controls odor, easy to find Needs regular replacing Most backyard setups Straw Cheap, good insulation Can mold, not very absorbent Cold climates Hemp Very absorbent, low dust More expensive Low-maintenance coops Sand Drains well, easy to clean Heavy, cold in winter Dry climates Bedding for Different Areas of the Coop Not all areas of your setup need the same bedding. Coop Floor The coop floor needs bedding that absorbs moisture. controls odor, and provides cushioning for your flock. Pine shavings or hemp work best here. Aim for a layer about 2 to 4 inches deep so it can handle daily droppings. Nesting Boxes Nesting boxes should be soft, clean, and dry. Straw or pine shavings work well. The goal is to cushion eggs and keep them clean. Check nesting boxes often and replace bedding when it becomes dirty or damp. Chicken Run Most chicken runs are bare dirt, but that can turn into mud quickly. Adding sand, mulch, or a layer of straw in problem areas can help control mud and improve drainage. How Much Bedding Do You Need You do not need to overthink this. A few inches of bedding on the coop floor is enough for most setups. Too little bedding leads to moisture buildup, and too much just wastes material. Start with about 2 to 4 inches and adjust based on how quickly it gets dirty or damp. How Often Should You Change Chicken Bedding A simple routine keeps everything under control. Light Cleaning Once a week, remove obvious droppings and add a small amount of fresh bedding. This makes the weekly cleaning task much easier and keeps the coop from getting out of hand. Full Cleaning About once a month, remove all bedding and replace it with fresh material. If you notice strong smells or damp spots sooner, you may need to switch to a bi-weekly cleaning. If you want a step-by-step walkthrough, see our guide on How to Clean a Chicken Coop (Step-by-Step for Beginners), which breaks down the process in detail. 💡 Beginner Tip If your coop smells bad, it is almost always a moisture problem, not a bedding problem. Improve airflow and keep